Here's every boss you can fight in the new Elden Ring expansion.
There are a lot more Shadow of the Erdtree bosses than you thought there were; I can almost 100% guarantee it. Elden Ring's first expansion has 55 bosses, including returning boss types from the base game, while 42 of these could be considered original.
These range from field bosses like dragons and Furnace Golems to dungeon-based bosses like those in catacombs and Gaols, as well as NPC bosses in Mausoleums. Some of the bosses I've included, like Ulcerated Tree Spirits, could technically be considered as very tough enemies, but here I've listed them since they drop unique items that a regular enemy wouldn't.
In this Shadow of the Erdtree boss list, I'll run through every boss in the expansion, where they're located, plus what each of them drop. Since the main boss section will contain quite a lot of spoilers, especially the last boss, I've put it at the end of this guide.
You can find these giant wandering braziers throughout the Land of Shadow and each one will drop one of the new Crystal Tears. There are eight Furnace Golems altogether. You can find these:
These bosses also drop the Furnace Visage crafting material.
This new zombie dragon is pretty similar to those in the base game, except it breathes ghostflame. There are three of these in the game, and they each drop a Dragon Heart and a Somber Ancient Dragon Smithing Stone. You can find these in:
That's right, your favourite boss is back! There are three Ulcerated Tree Spirits in Shadow of the Erdtree that drop various items. You can find these:
You'll have an opportunity to fight three of these dragons when you visit Jagged Peak; first, one on its own as you enter the area, then two together further up the mountain. These each drop a Dragon Heart and a Dragonscale Flesh consumable.
There are three of these big hippo bosses in the Land of Shadow. The main one is the Golden Hippopotamus that you fight at the entrance to the Shadow Keep in Scadu Altus. This gives you the Aspect of the Crucible: Thorns incantation that lets you fire out spikes at enemies, plus two Scadutree Fragments. There are also regular hippopotamuses in:
Both of these drop Scadutree Fragments.
Just like the Tree Sentinels that guard the gate of Leyndell, you'll fight two of these in the Hinterlands area, one after the other. One has the torch and halberd combo, while the second has a halberd and a shield. They each drop a Blessing of Marika consumable flask.
This boss is located in the same Hinterlands area as the Tree Sentinels; just look for the big crater and the gravity portal that shows where the boss will appear.
You can find this boss further up the track towards the top of Jagged Peak, after you've defeated the twin Jagged Peak Drake boss. This is your typical ancient dragon with red lightning attacks, but watch out since his arena is filled with lightning-conducting water.
Though he's just an NPC, Dryleaf Dane is technically a boss. We talk about the specifics of how to challenge him in our Monk's Missive guide, but he will give you those martial arts gloves from the trailer.
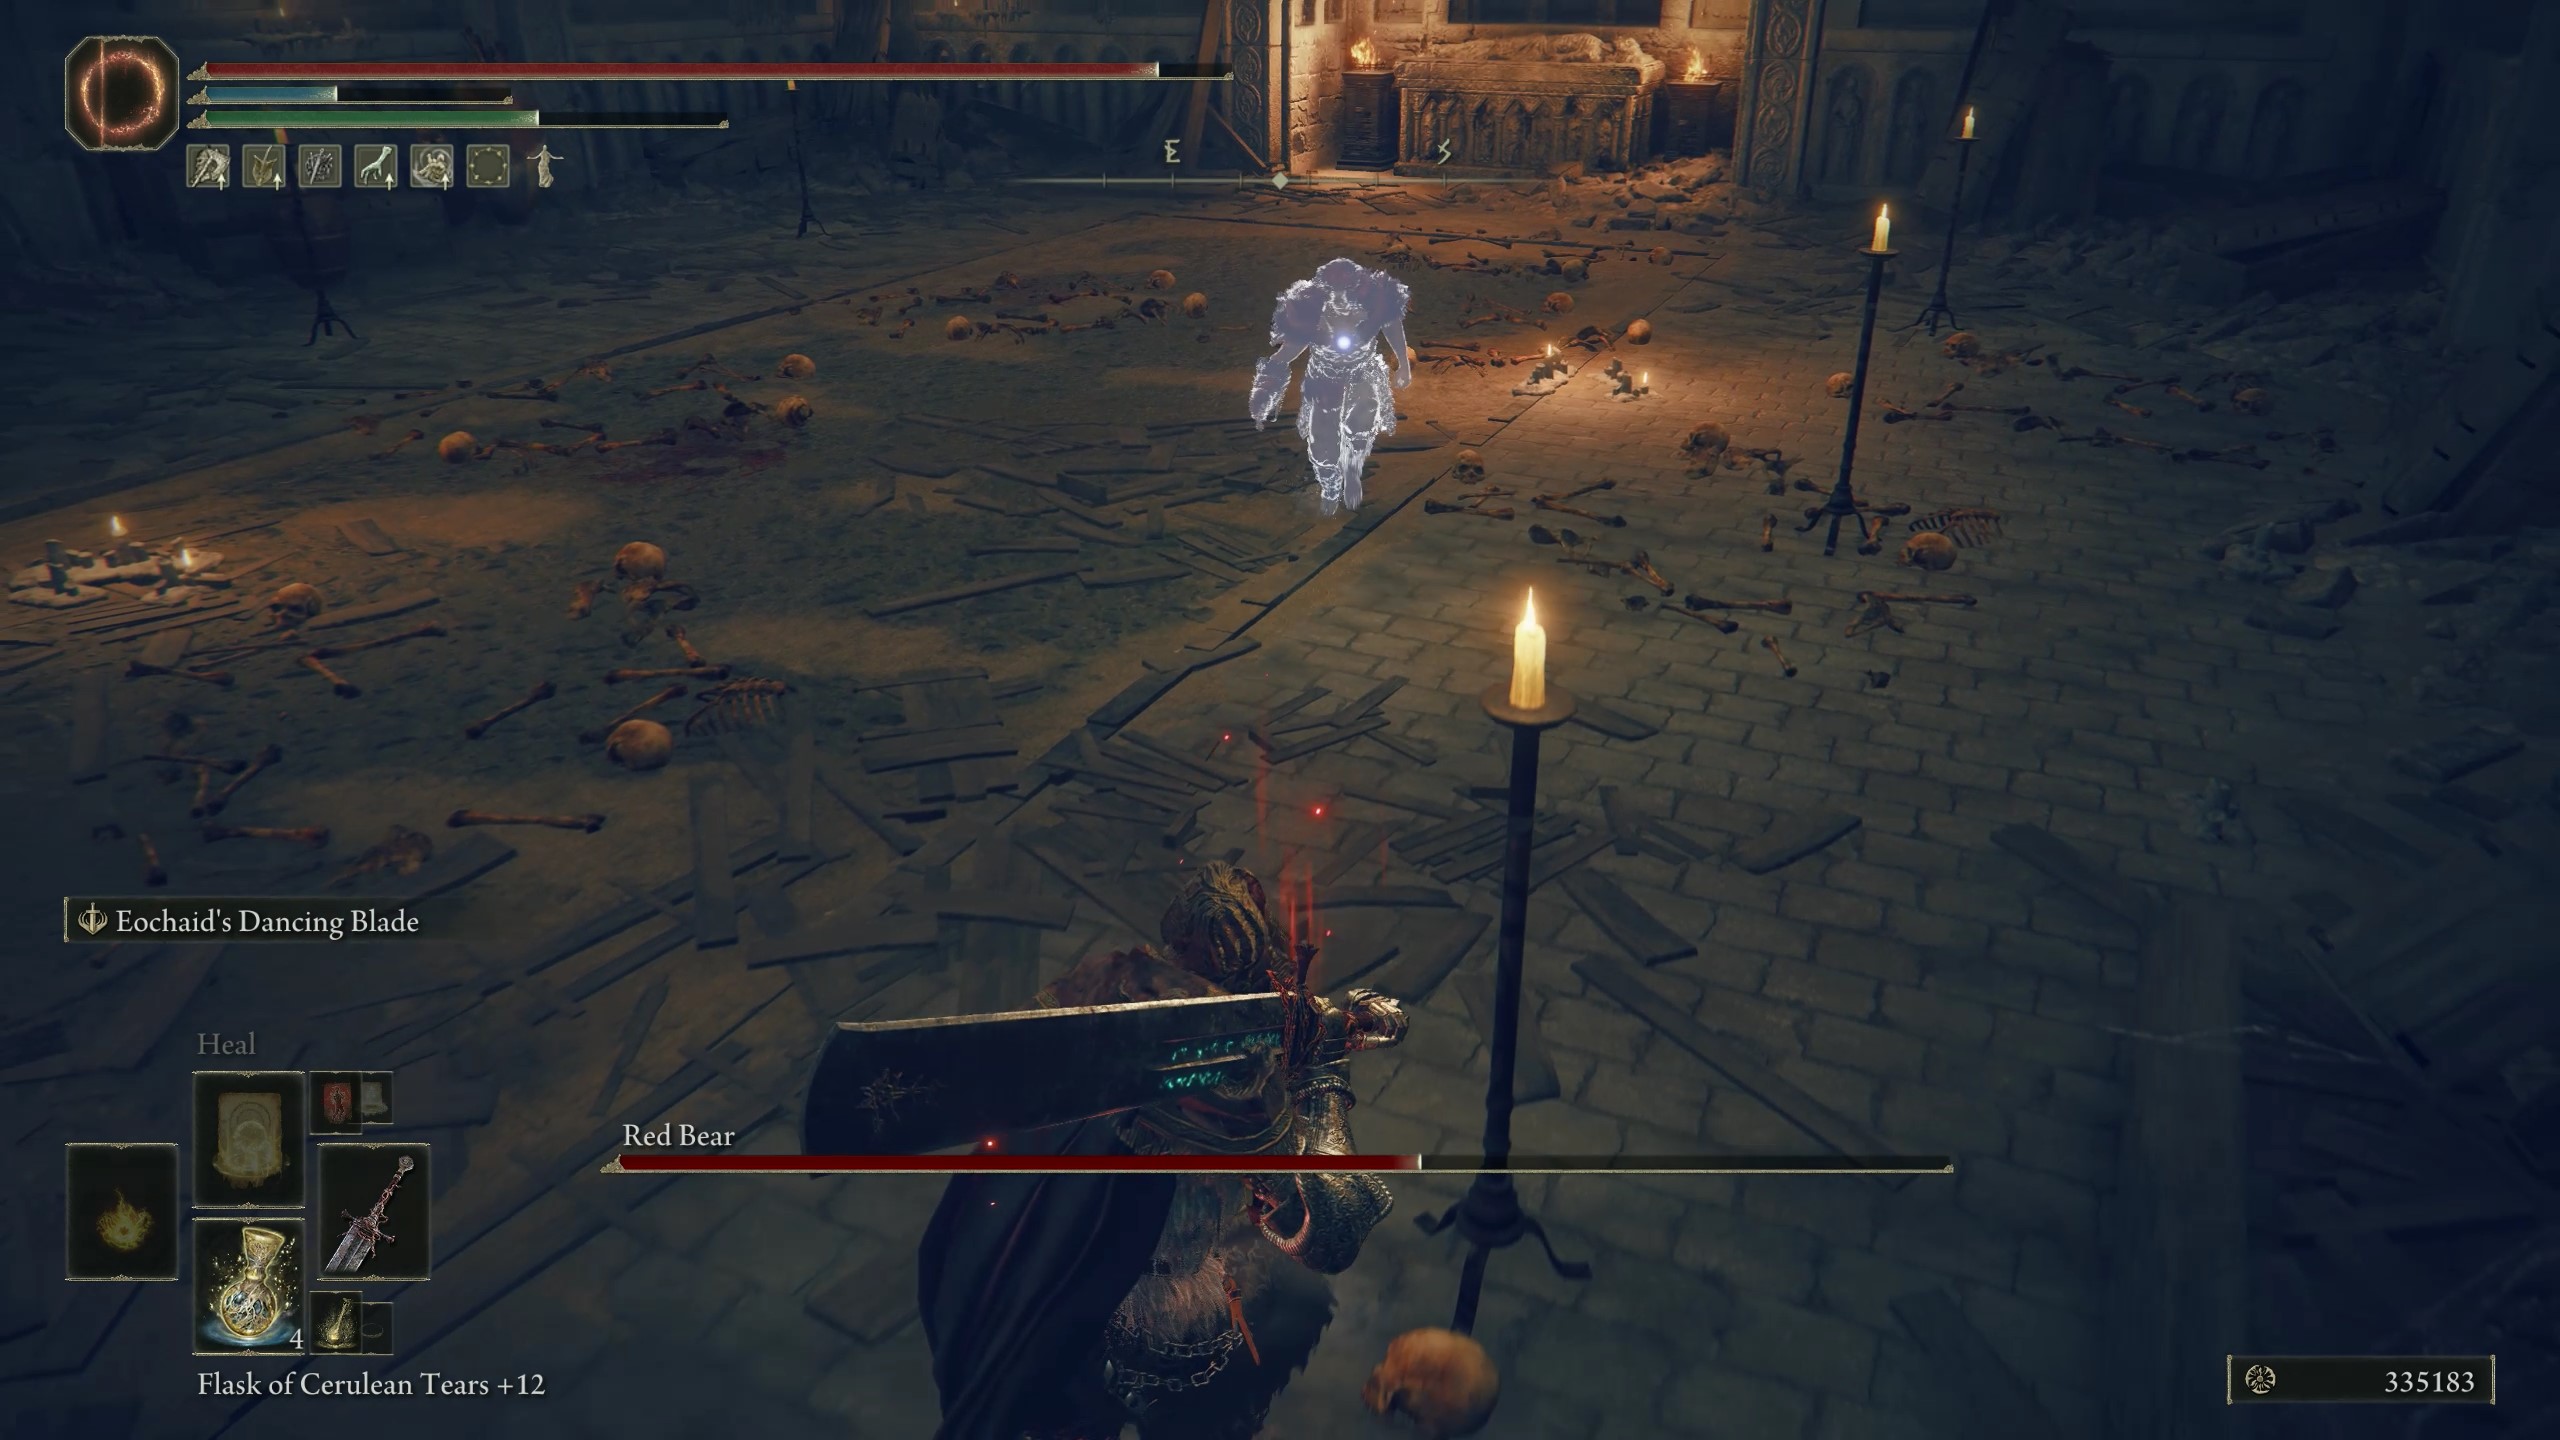
This is the first of two red rune bear bosses in the game. They're much the same as regular runebears except that they have a giant AoE roar and cause earthquakes like Godrick or Hoarah Loux. This first one gives you a bear hat, so is well worth fighting.
The harder second red bear is located in a wood in the north-west area of the Ancient Ruins of Rauh. He's only accessible at ground level, so you'll have to make your way in from Scadu Altus, head past the pest area, and into the woods to find him. His reward is the roaring bear head spell from the trailer.
Just your typical Demi-Human Queen boss from the base game, with a Demi-Human Chief and a load of other Demi-Humans protecting her. The most notable thing about this boss is that she drops the katana wielded by the new Demi-Human Swordsman enemies.
They even managed to squeeze a deathbird into Shadow of the Erdtree. The Charo's Hidden Grave area is accessible via Jagged Peak, where you'll find this big bird in the watery graveyard area.
This boss is a speedy Demi-Human who uses a magical katana. Despite his speed and acrobatics, he's quite easy to stagger so you can very easily gang up on him with a Spirit Ash.
Similar to the version of the NPC who invades you on the road to the dungeon, but now he does Malekith-esque dragon fire slashes and has dragon incantations like bite. Still, the slashes are highly telegraphed, so you can just bully him with a Spirit Ash otherwise.
Just a regular Magma Wyrm from the base game. You can find him in the opposite direction from where you drop down to fight the Ancient Dragon Man.
A very cool new dungeon boss who is essentially a Leyndell dragon cult knight who uses lightning twin axes and lightning incantations. He's not too hard to fight, though, provided you have a Spirit Ash to distract. Just be wary since he's very fast-moving and aggressive due to using Ash of War: Blinkbolt.
A slightly tougher version of the regular blood fiend enemies with a different moveset. The main difference is he can cast blood talons, do butt slams, and lunge at you. You'll need to get to the Ellac Riverbed area to access this dungeon.
A big pushover, really. He's a twinblade-wielding Black Knight which is kind of scary, and he uses that aspect of the crucible that lets you fly. That said, he has the health of a regular Black Knight enemy, so isn't hard to kill. You'll find the Fort of Reprimand in south Scadu Altus.
Your typical Curseblade enemy with the two circular blades and the spinning acrobatic moveset. To get here, you'll need to descend through the Moorth Ruins in Scadu Altus to emerge at the Bonny Village with the Gaol just nearby.
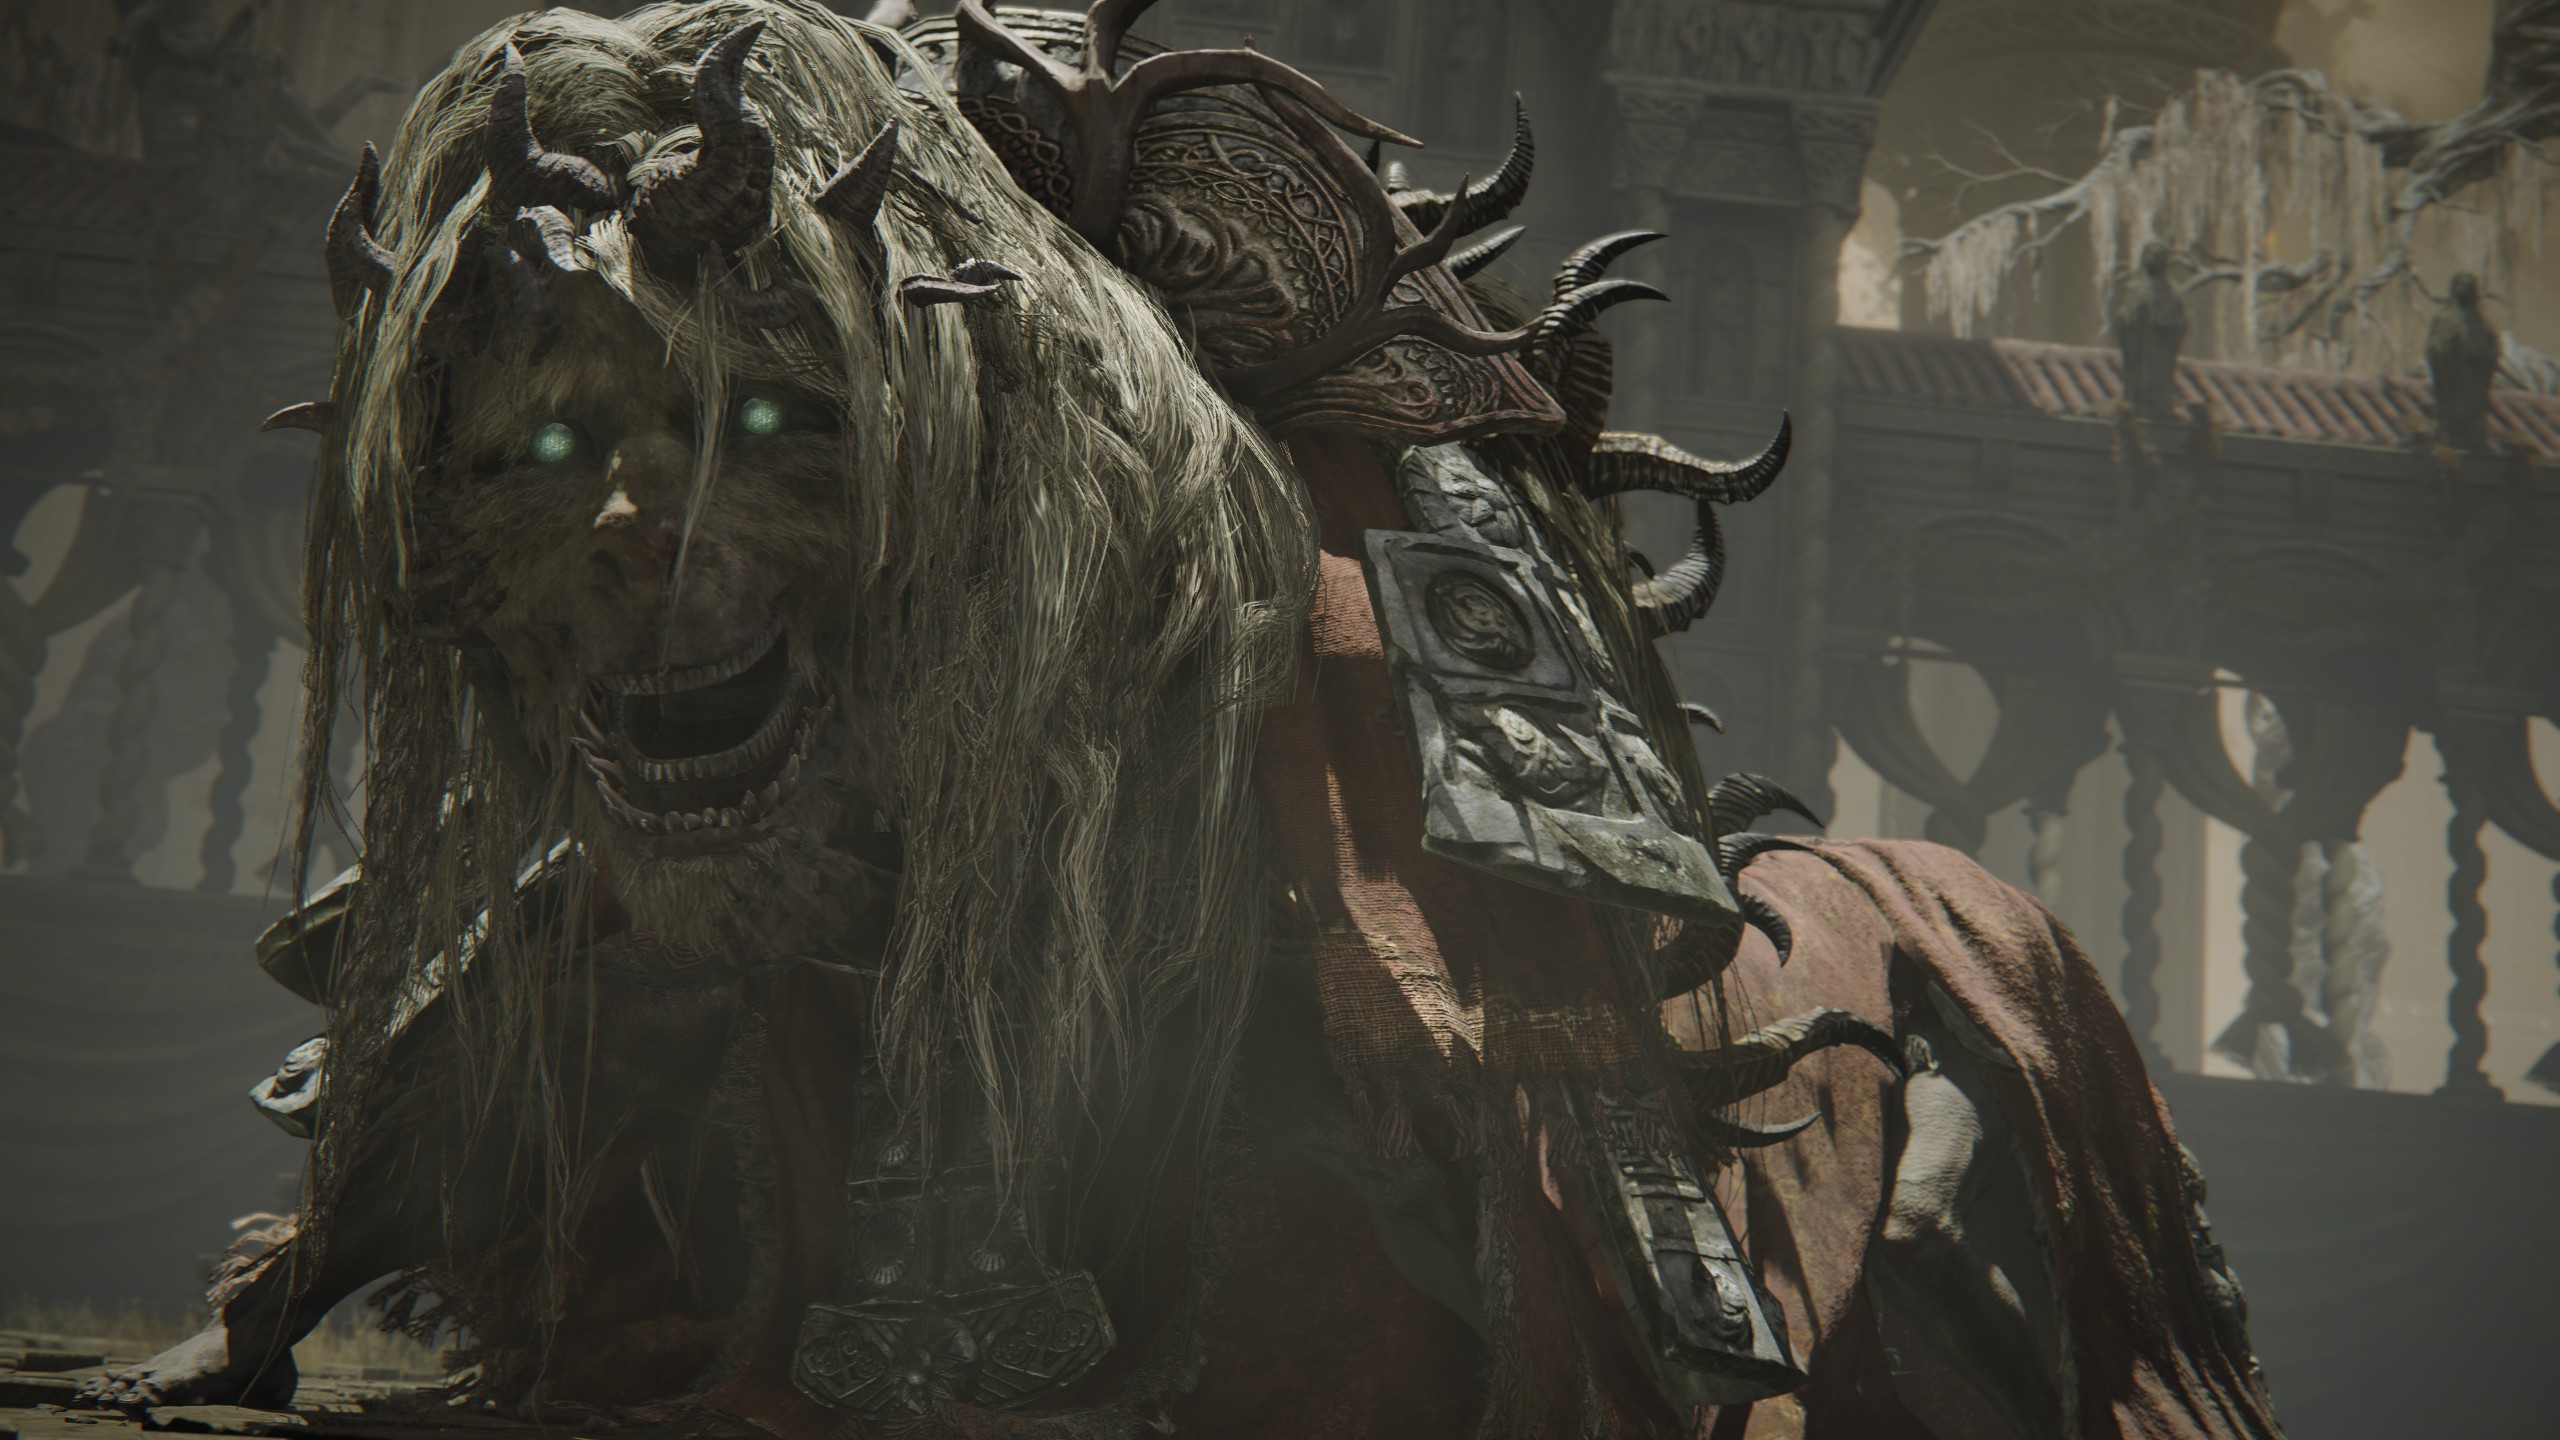
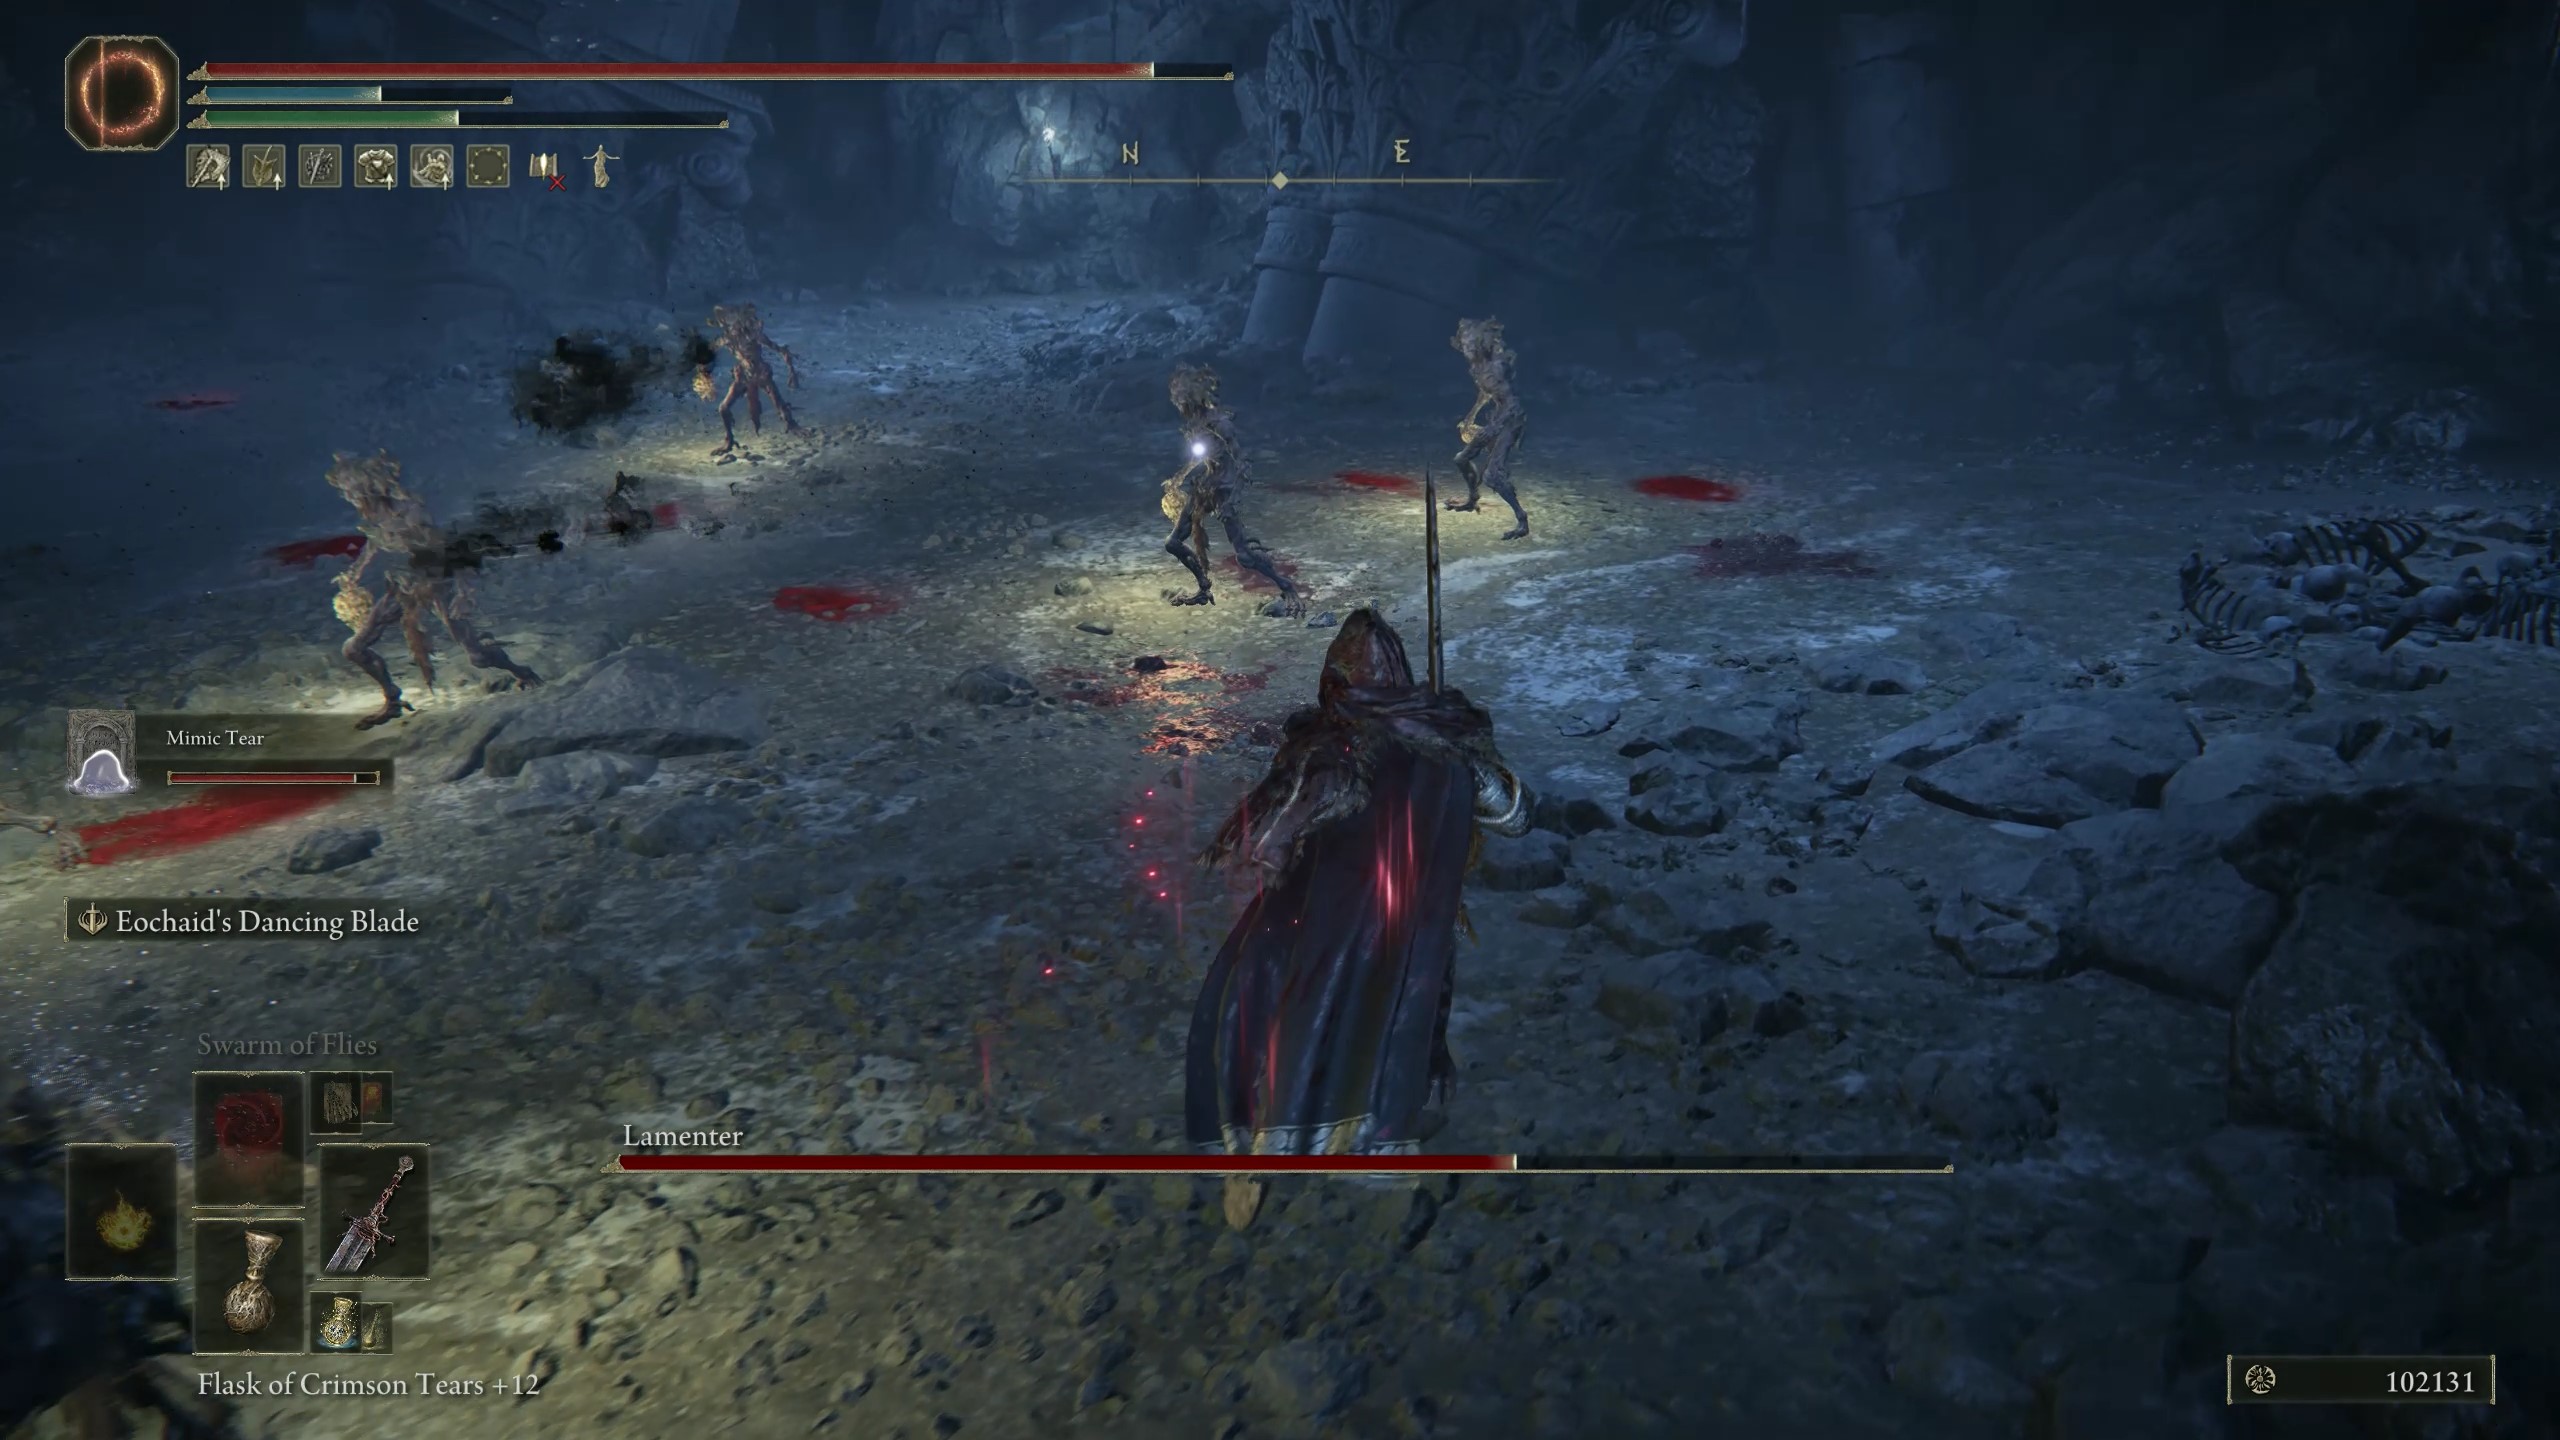
Not a particularly tricky boss, just a horned dude who likes to disappear and summon lots of copies of himself. Keep hitting his copies until one doesn't die and you've found him. The reward for this boss is very strange; a mask that lets you turn into a strange horned creature called a Lamenter.
Very similar to the other Death Knight boss, but this one has a grab attack that steals health and uses a big two-handed axe instead. You'll find the dungeon at the far north-west of the Rauh Ruins Base area, along the river past the pests, and where all the flying insects are.
A Hornsent spellcaster boss who summons barrages of golden arcs and other Hornsent inquisitors to help him out. He's not so bad if you summon and he doesn't have much health, but watch out when he summons the really big Hornsent inquisitor enemy, since this can mess you up. This dungeon is very out of the way, and only accessible via lower Scadu Altus.
Just an NPC dude with a greatsword, repeating crossbow, and mega poise. Bait out his attacks to get hits in, especially after he does his full ash of war combo firing the air blade, or after he's finished firing his crossbow.
Not a particularly hard boss, just a dex NPC wielding a pair of curved swords. The only attacks you need to watch out for is when she summons two waves of flame or does the Dancing Blade of Ranah unending dance combo, which goes on for days. You can access the island with the Mausoleum by searching along the shore for a cave.
This guy is very similar to Logur who you find in the woods in the starting area; an aggressive beast claw-wielding fella dressed as a bear. He just keeps coming and will also summon a bear head midway through the fight to roar at you.
This great katana-wielding warrior isn't too hard to beat, but has impressive reach with their weapon. On the plus side, they are quite slow with their swings which lets you get some hits in. The only way to access the area with this mausoleum is by gaining access to lower Scadu Altus through the Shadow Keep and continuing down the river.
This is a very chaotic boss since the Dancing Lion's movements are unpredictable and it changes between different elements throughout the fight. You can, however, summon Redmane Freyja to help. It's worth noting there is a second secret Dancing Lion boss in the temple that you can see in upper Rauh Ruins.
A dual sword-wielding knight who throws glintstone sorceries into the mix. The fight feels very similar to Loretta from the base game, except that Rellana is a lot more aggressive and combos for days. Halfway through the fight she'll light up one sword with magic and one sword with flame like Pontiff Sulyvahn in Dark Souls 3. You can summon Leda and Dryleaf Dane for this boss.
A strange star creature like Astel, but this one is riding a horse and has a big two-handed curved blade that it throws like a boomerang. Though its attacks aren't too hard to dodge, it does a lot of damage. The good news is that you can summon Thiollier for this battle if you find his summon sign as you drop into the arena.
This mounted boar rider is pretty tough, mixing gravity magic with regular attacks similar to Radahn. His spells include firing gravity magic at you with his lance, and he’ll even fly up into the air like Radahn when he does his big whirlwind attack.
A giant ancient dragon who resides at the top of Jagged Peak. This optional boss is comparable to Placidusax from the base game, though arguably much harder. However, if you're pursuing Igon's quest, you can summon him for a little help just inside the boss arena.
A scarlet rot boss who has a lot of sweeping attacks and AoE scarlet rot inducing explosions, but honestly not that hard if you stick close to her. Something about the weird shape of her body means that if you stay close to her torso a lot of her glaive swings don't seem to connect at all. Also be sure to bring some kind of anti-scarlet rot like the Flame Cleanse Me spell.
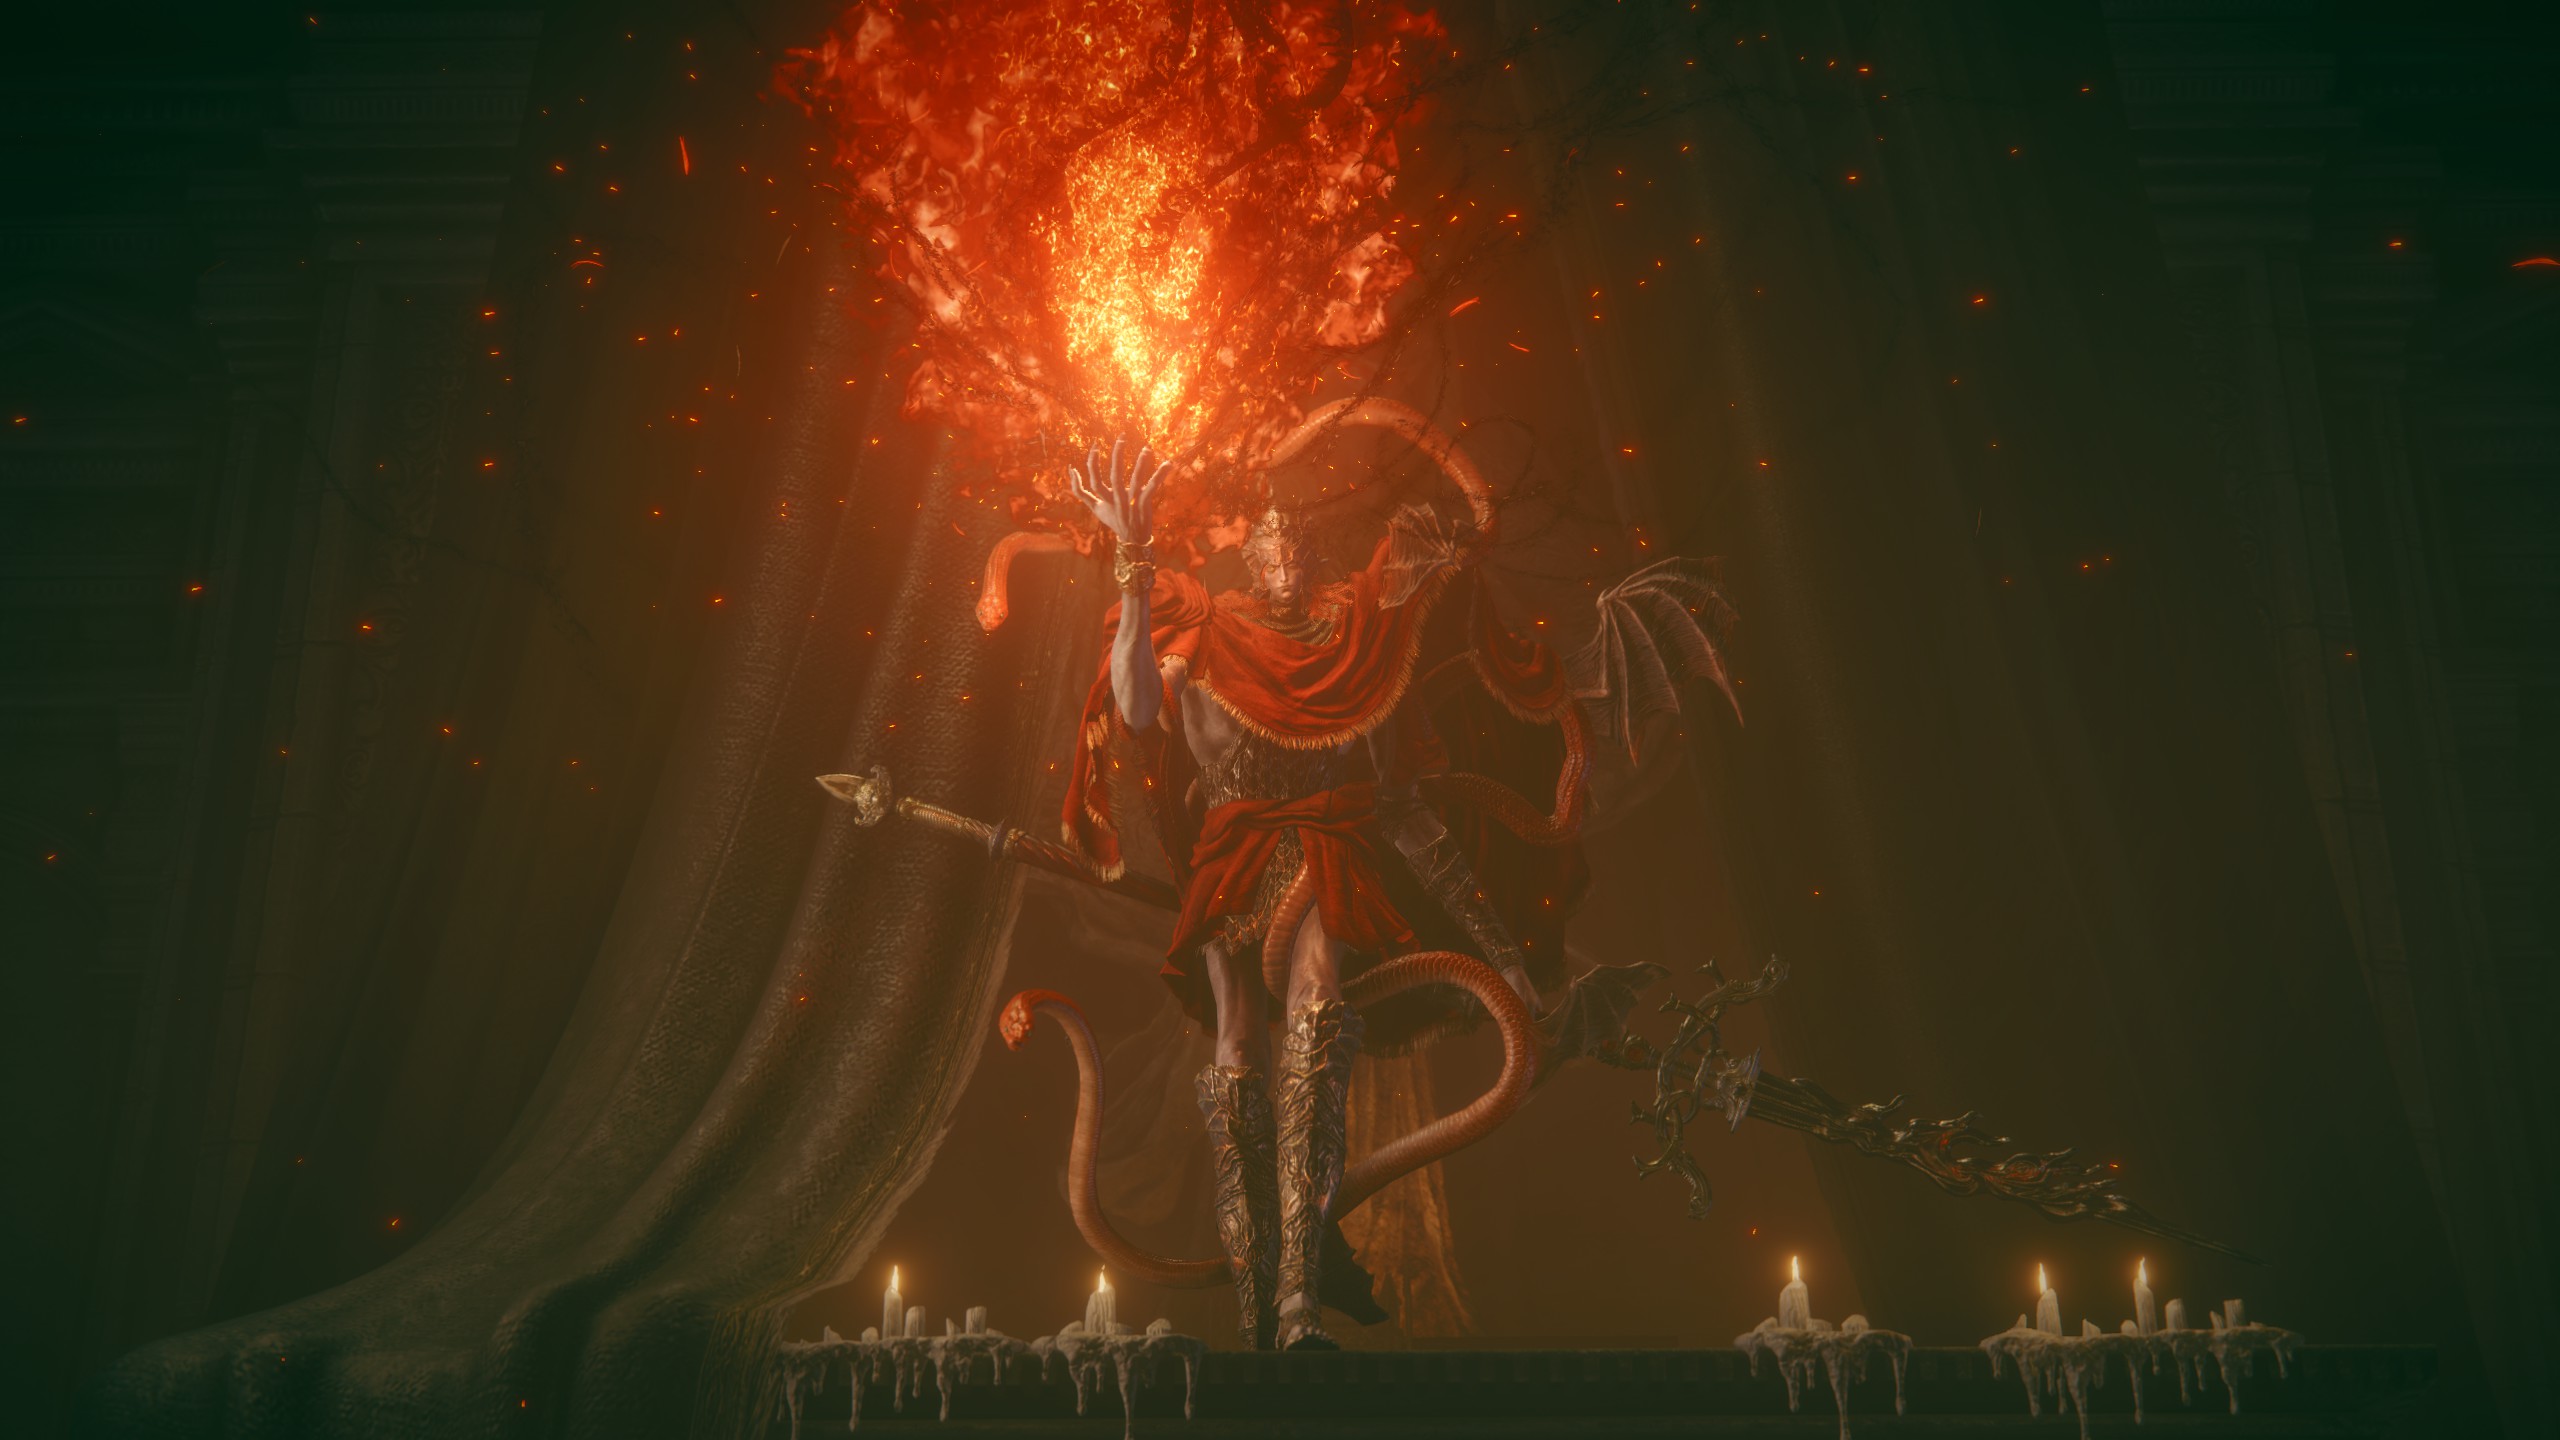
One of the main stars of the Shadow the Erdtree, Messmer is both very mobile and highly aggressive, mixing Messmer flame pyromancy spells with spear thrusts. His second phase is especially fearsome as he becomes even harder to catch. If you need help, you can summon the Hornsent for this fight inside the arena provided you're pursuing his quest.
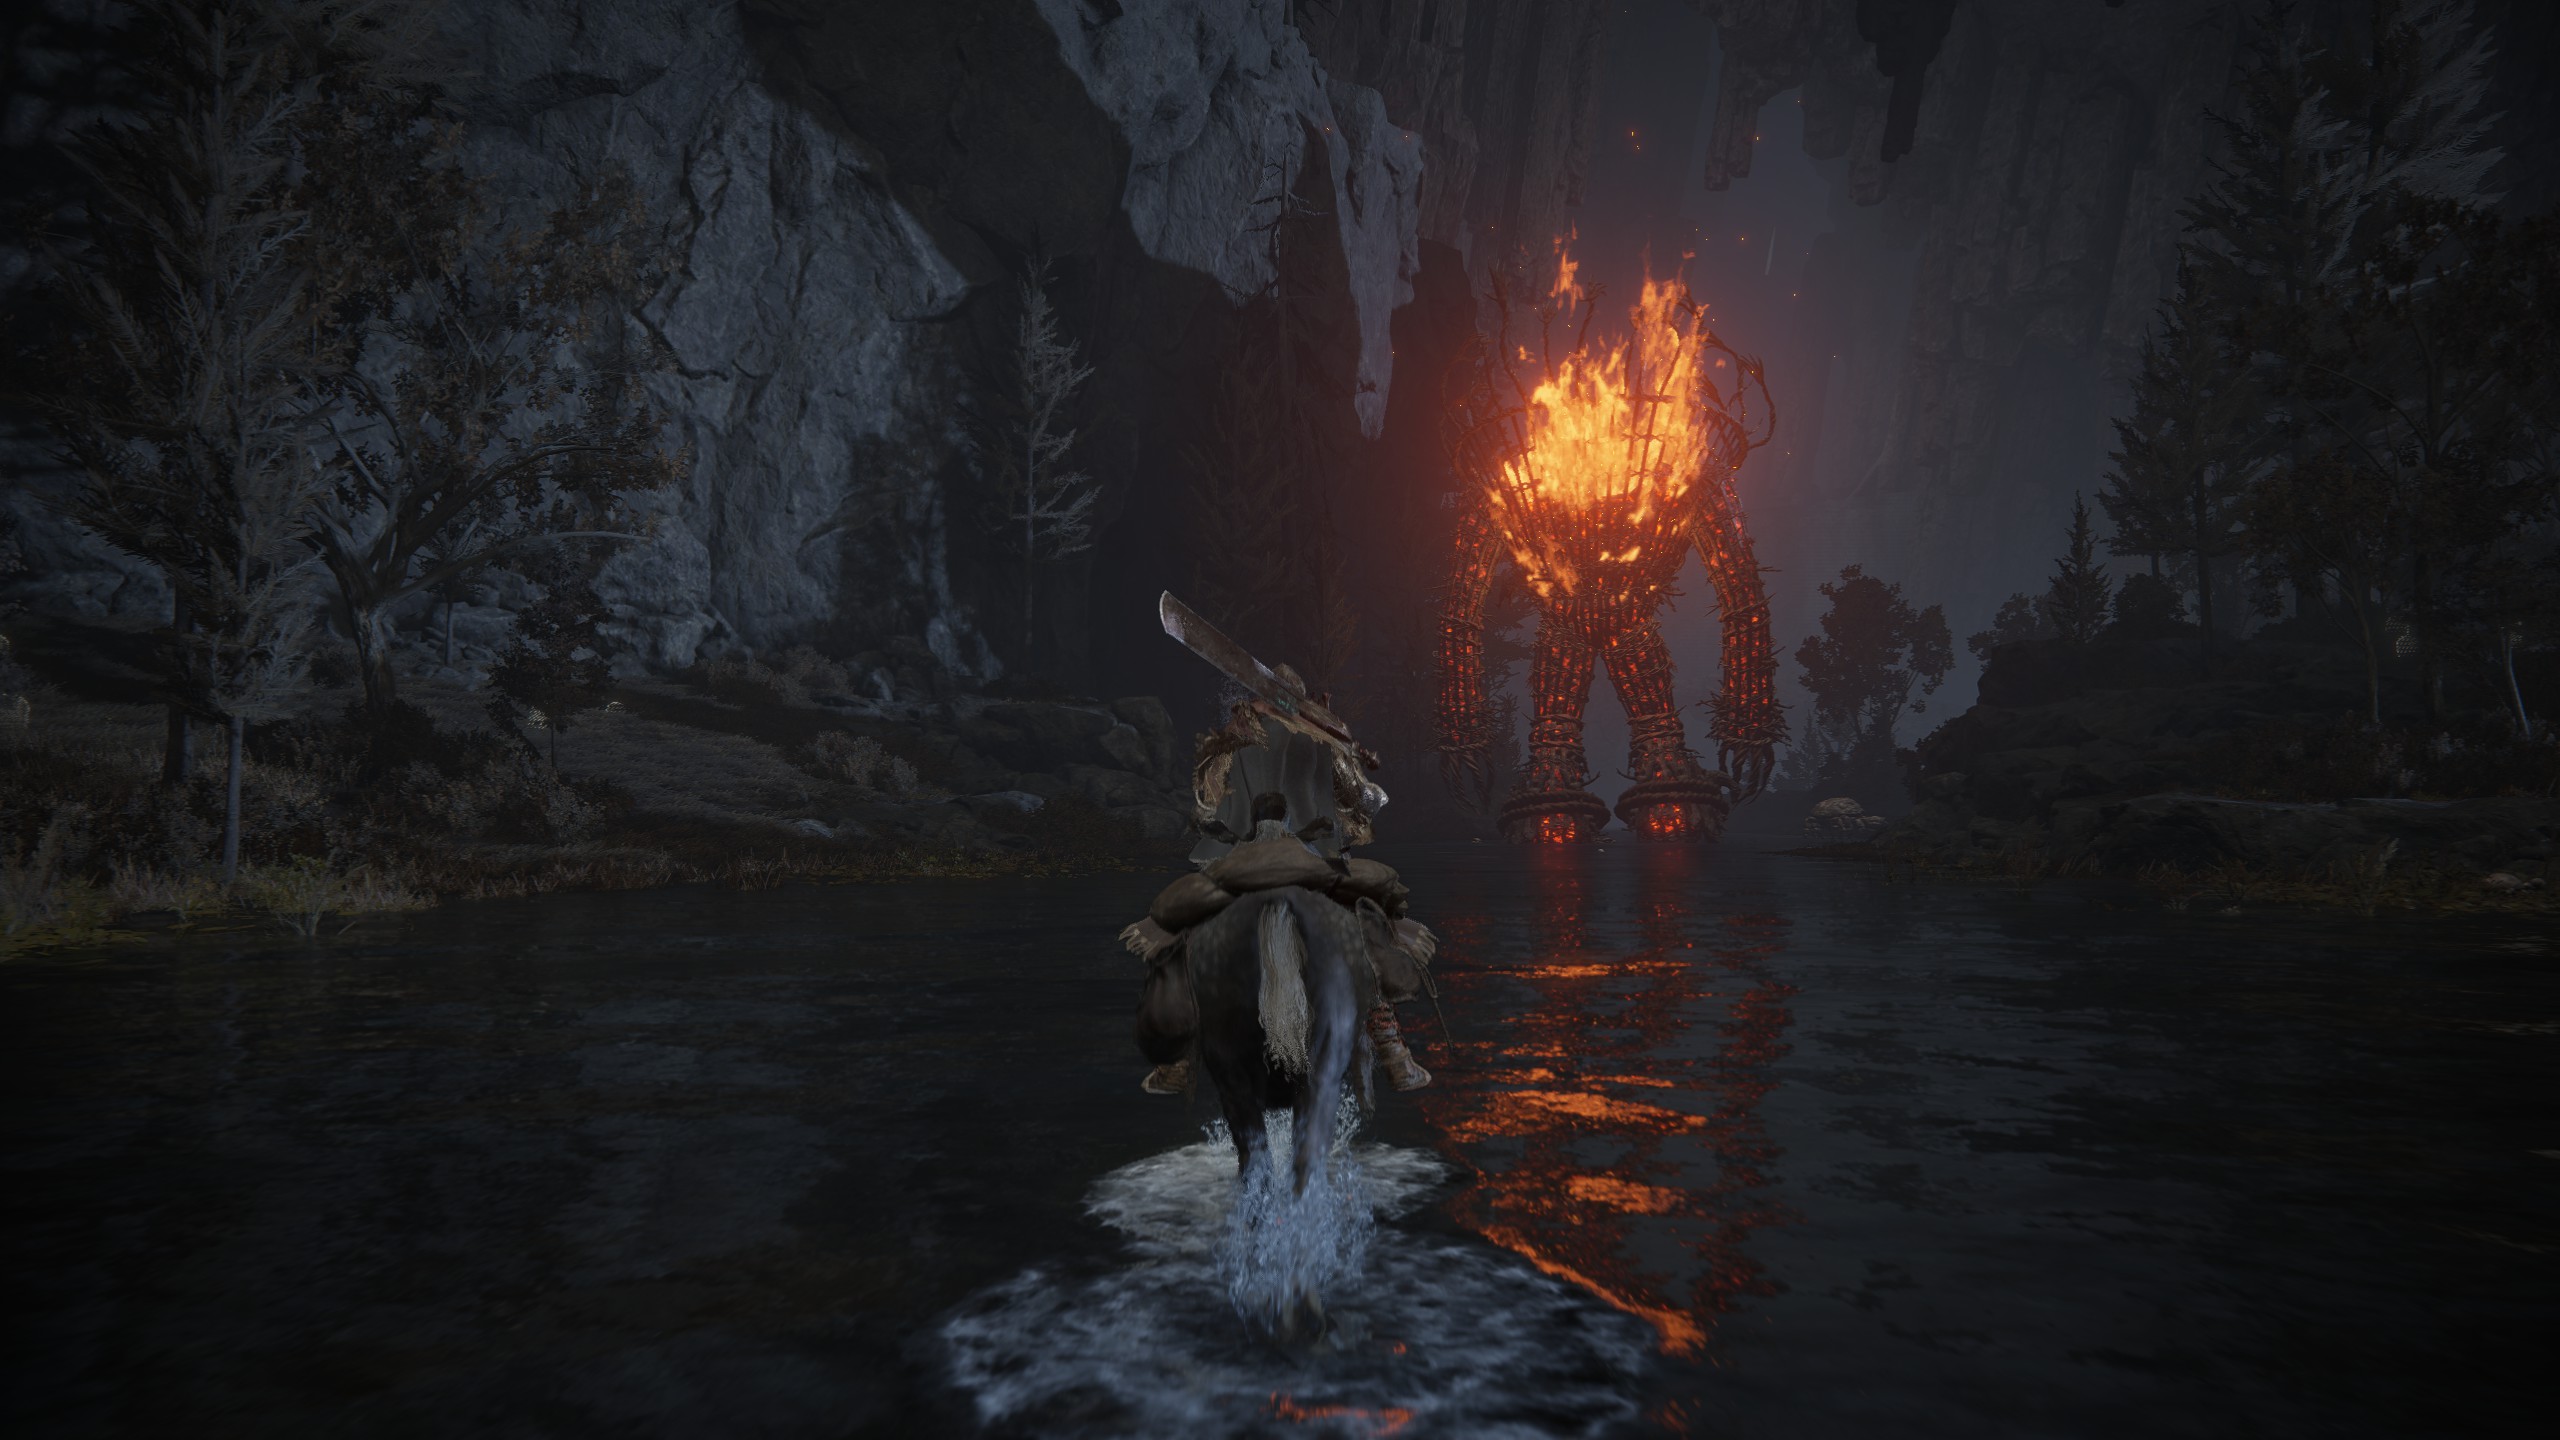
My favorite boss in the game, a giant shadow sunflower with all sorts of thorn spells and shadow magic. Fairly easy if you focus on its head, but you have to kill it three times to win. Each time it's downed, use a critical strike on the flower. It will revive with a third less health, so you do this three times.
Not quite a giant hand, but more like a messed up cosmic hand-creature with a finger for a face. Definitely the most Bloodborne-esque boss in Elden Ring and its remembrance gives some very fun items. To access this boss, you'll need to complete Count Ymir's quest, which you can start in the Cathedral of Manus Metyr in east Scadu Altus.
You'll want to bring some madness resistance for this fella. Midra may seem underwhelming at first, but he'll transform into a fearsome boss who combines madness spells with fast-moving attacks and AoE explosions. The only way to access this boss is by getting to lower Scadu Altus through the Shadow Keep, and descending the river to the Abyss area.
This boss is a young Radahn on foot, and he actually feels quite similar to Radahn in the base game in terms of his attack timings and patterns. At two-thirds health, Radahn will enter a super state which enhances his regular combos and adds new AoE holy attacks, and this is when it gets extremely spicy. You can summon a variety of NPCs for this boss depending on whose quests you completed.